


Decking Planning and Advice
Reading time: 5 minutes
Planning and measuring
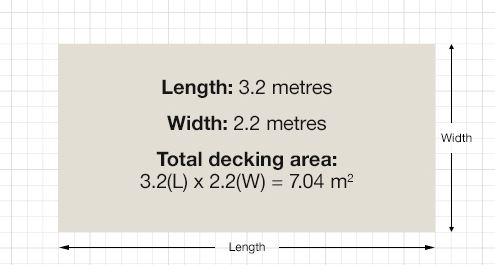
If you’re thinking to yourself, ‘how much decking do I need?’ planning the area out in a solid square or rectangle first will help to keep it simple, then you simply need to multiply the width by the length.
Not all garden decking will be as simple as this. For unusual shapes, plan each section out in squares, slightly over-estimating for awkward corners. When you’ve planned out the sections and laid them out on a sheet of paper with your measurements, mark them out on the lawn with string and stakes, or pegs.

Things to consider:
- Check the depth and position of underground pipes or cables
- Avoid blocking access to manholes covers
- Check for any drainage issues - decking needs good airflow and ventilation
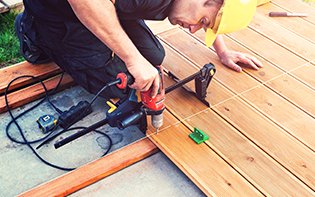
How to install timber decking
You should always ensure you read the manufacturer's installation instructions and guidance before you begin. These are a guide only and different types of decking boards will have differing installation instructions, especially for composite decking.
- Use 75mm galvanised screws for durability
- When joining boards, this must be done over a joist. Add more joists as necessary
- Make sure screwheads are countersunk below the decking surface to avoid catching feet
- Leave 25mm at the ends of decking boards to allow for fixings
Fixing decking to a wall
If attaching your decking directly to a house, the top of the decking must be two brick courses or more below the damp proof course. This might not always be possible, so it’s best not to attach the decking to the wall at all, leaving a gap between the house and decking with draining running in between. You will also need to bolt a ledger board to the wall to support the joists.
Raised decking or laying decking on grass?
Garden decking can be placed at ground level or you might choose a raised deck design. There are reasons to choose either, but it’s often down to level lawns that come up to meet the doors and entrance ways. However, there’s sometimes a need for decking to be raised and the effect can give a garden a more usable and practical lease of life.
How to lay wooden decking on grass
For an effective and stable decking area you shouldn’t lay your boards directly onto grass itself - you need to ensure it’s well ventilated to reduce the risk of potential rotting.
Firstly, dig out an area the size and shape of your plan, removing a 5cm layer of turf. It’s a good idea to lay weed control landscaping fabric, after this is dug out, to help reduce light reaching the ground. Alternatively, you can use a permeable membrane with pierced holes instead.
Next, build a series of wood sub-frames for the decking to rest on. These sub-frames will sit in the area you’ve dug out and you’re all set to add your decking. You can also use concrete paving slabs for stability.

Building a raised deck
When building an elevated deck it’s, as you might expect, slightly more involved than ground level decking. Firstly, depending on how high you build the decking this might require planning permission. The general rule is that if the decking doesn’t exceed 30cm above ground then you shouldn’t need permission from the council. It’s also a good idea to speak to your neighbours too, as complaints from other people near you can affect planning permission.
The stages for building a raised decking area start off similarly to a ground level deck, with mapping out and marking the area where you want it to go. However, when it comes to the sub-frame, this is needs to be taller and therefore more supported.
Decking posts should be positioned at 180cms, or under, apart and half the length of the post should be dug into the ground and set in concrete. Because of an elevated deck construction, you may need to think about fitting decking balustrades and deck handrails, as well as timber decking steps.
Disclaimer: The information contained on this page is intended as an overall introduction and is not intended as specific advice from a qualified professional. Travis Perkins aims to avoid, but accepts no liability, in the case that any information stated is out of date or differes from any manufacturers' guidance.
 This website uses cookies