


Free Click & Collect
Within One Hour

Reading time: 4 minutes
There is plenty of appeal to using hardwood sleepers to create a retaining wall. The material is heavy and durable, while being known to last for over 40 years too. However, hardwood sleepers are also often more expensive than timber sleepers.
As well as being a cost-effective option, you should consider using timber sleepers to build a retaining wall for the following reasons:
They provide a clean and modern appearance, due to being uniform in their dimensions.
The material is lighter to handle and easy to cut, though be sure to treat any cut area to protect the wood from rot and insects.
They can last for at least 20 years if treated or painted occasionally.
The material brings a natural aesthetic to a property’s garden, which can merge seamlessly with exterior surroundings.
The natural appearance of timber sleepers also adds character and warmth to a garden.
Timber sleepers are designed to withstand changes in weather.
The design of your retaining wall will affect the foundations that you establish for the structure.
If you are creating a horizontal retaining wall with timber sleepers, then this can be laid straight onto concrete slabs.
For a retaining wall that will have sleepers driven vertically into the ground, however, you should make sure there is suitable drainage around each post. Placing pebbles or shingle into a trench before fitting the timber sleepers is advised.
Are you going to lay timber sleepers directly onto soil when building your retaining wall? It is recommended that you create a foundation with gravel or sand first, so that the structure is installed onto a level surface that will not become unstable should the soil ever become waterlogged.
Gravel will also allow adequate drainage to be built around a retaining wall, though you could fit a drain pipe at the base of larger walls to avoid water from pooling across a structure.
Creating a retaining wall with vertical timber sleepers is great when you are tasked with constructing a freestanding feature wall in a property’s outdoor space.
It is also a great technique if the structure is being installed in a sloping garden, or the property owner has requested a curved wall that comes complete with tops which are staggered or stepped in their design.
Here are the steps to follow for building a vertical timber sleeper retaining wall:
1. Dig out a trench that covers the planned length of the retaining wall. This trench needs to be slightly wider than the sleepers being used, as well as one third the height of the sleeper in depth.
2. Line the bottom of the trench with a layer of shingle, pebbles, gravel or sand to help with drainage, as well as post mix that will secure posts in place.
3. Place each timber sleeper vertically onto the compacted base – use galvanised screws to secure them together.
4. Use more shingle, pebbles, gravel or sand to fill the space that has formed behind the vertical sleepers, making sure it is compacted for stability.
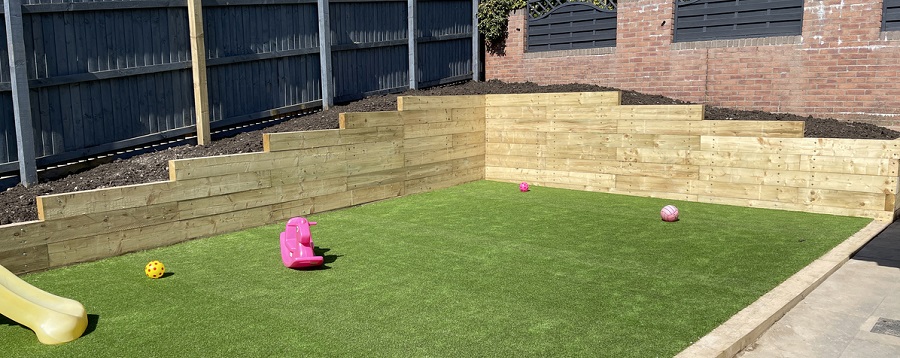
Horizontal sleepers is the more traditional design method for creating a sleeper retaining wall, with the structure establishing a brick-like formation.
Here are the steps to follow for building a horizontal timber sleeper retaining wall:
1. Start by deciding if you are going to position the timber sleepers on their short or long side. Choosing their long side helps you to build a stronger and more stable wall, but this will mean more sleepers are needed to reach the requested height of a structure.
2. Next, horizontally lay the first row of timber sleepers to the desired length of the wall being created.
3. Add the next layer of sleepers on top of this first row, making sure to stagger the joints as you would see in bricklaying.
4. Fix the two rows of sleepers together with 150mm timber screws.
5. Repeat steps 3 and 4 until you reach the full height of the retaining wall.
6. If you have built a tall wall, provide the structure with additional support by placing a fence post into the ground behind the sleepers at regular intervals and fix each post to a sleeper using more 150mm wood screws.
We hope you find this advice useful for your next landscaping project. Don’t forget that you can learn much more about how to use railway sleepers in the garden and steps to take to stop the material from rotting by reading this helpful guide that we’ve also prepared.


