


Free Click & Collect
Within One Hour

Reading time: 5 minutes
When correctly installed, dry verge fitting (or ‘dry fixing’ roofing systems) should last 10 years or more, and require very little maintenance. The plastic caps or verges that clip over the edge of the tiles keeps them in place, protecting them from rain and the elements, as well as from animals and pests.
Unlike fibreglass and GRP roofs, which are ideal for flat roofs, dry verge is more commonly used on pitched roofing systems.
Depending on the size and accessibility of the roof, clients can expect to pay between £500 to £2,000 to repoint a roof verge. This takes into account the cost of labour, dry verge materials and whether or not an access tower is required. Use a reputable contractor who is experienced in how to fit dry verge correctly.
Generally, dry verge is a long-lasting, cost efficient and reliable roofing system for homes and offices. The most common dry verge problems occur with badly fitted dry verge and drainage issues. If the mortar hasn’t been properly removed, if the roof is very old or if the plastic has been damaged it can cause water or unwanted wildlife to be let in.
Dry verge systems do not require mortar, and any mortar which is on the roof must be removed before installation. This is an important step, as the battens need to be exposed to fix the caps directly to them and the tiles. If old cement remains on the roof it can also cause airflow problems, and the dry verge can fall off in strong winds.
To fix badly fitted dry verge which has been installed over mortar, the caps will need to be removed and any remaining mortar chipped away with a hammer and chisel before reattaching the dry verge.
Sometimes the end caps or starter units can be improperly installed or can be damaged over time, causing them to let water in or not drain properly to the guttering and drainage system. It’s vital that the dry verge fits the guttering well, to avoid damp and damage to your walls.
To fix this issue, the end caps and adapting couplers may need replacing, to ensure a water tight finish which avoids future dry verge problems.
When the dry verge was installed, sometimes contractors have problems with the tile battens not extending far enough to fit the system, which can cause the roof to fail and leak. Usually 20mm is required at least. It’s vital that installers follow the fixing instructions, and ensure that the roof tiles and dry verge are compatible.
An additional fixing kit may be required, or a more appropriately sized dry verge system installed which fits the current roof.
Sometimes a low quality or badly fitted dry verge can leak water and cause moss or mould growth on the building, which looks unsightly. It’s important that the system is positioned off the wall, as well as having a specially designed nib or lip to keep the dry verge itself away from the wall.
As mentioned, poorly fitted dry verges can cause water to leak and drip onto the building, which can cause damp and mildew problems. This can sometimes be down to a blockage in the guttering, which should be removed and regularly maintained to prolong the life of the roof. However, if this is due to poor dry verge fitting, the caps will need to be removed and replaced.
Before fixing the dry verge, the old dry verge will need to be removed. Start at the top of the roof and work your way down by unscrewing the end cap, then the unit attached, all the way to the starter unit. You may be able to fix the problem and replace the dry verge (such as if mortar hasn’t been removed, or if there’s an issue fixing the caps to the roof battens), but if there’s damage to the system or the drainage doesn’t fit properly it will need to be replaced.
New dry verge fitting, or replacing old or badly fitted dry verge, is a straightforward task but which should be done by an experienced professional. How to fit dry verge to new or existing roofs is a fairly quick and simple job, thanks to the durable plastic clips that cover the edges of the tiles, as long as they are fitted correctly.
When properly installed, dry verge roof systems should be a long lasting and durable solution. However, common problems include poor fitting, causing water leaks, or if the mortar isn’t removed before the dry verge is installed.
Dry verge can be easily fitted to an existing roof, or to a new building, and it’s ideal for pitched roofs and gable ends. If fitting dry verge to an existing roof, the old mortar must be removed first to prevent dry verge problems later on.
Before fixing dry verge, the old dry verge will need to be removed. Start at the top of the roof and work your way down by unscrewing the end cap, then the unit attached, all the way to the starter unit. You may be able to fix the problem and replace the dry verge (such as if mortar hasn’t been removed, or if there’s an issue fixing the caps to the roof battens), but if there’s damage to the system or the drainage doesn’t fit properly it will need to be replaced.
Dry verge systems do not require mortar, and any mortar which is on the roof must be removed before installation. This is an important step, as the battens need to be exposed to fix the caps directly to them and the tiles. If old cement remains on the roof it can also cause airflow problems, and the dry verge can fall off in strong winds.
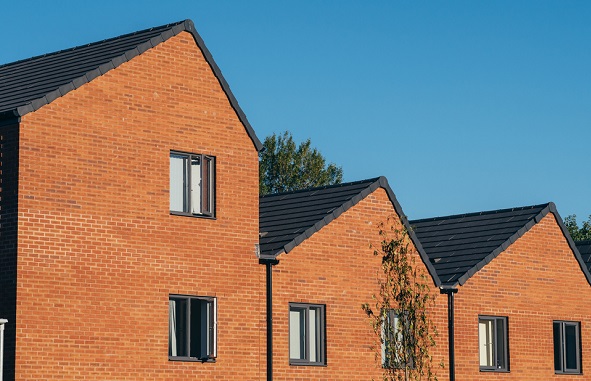
Dry ridge roofing systems securely fix the ridge tiles onto the roof without using traditional mortar. Dry verge systems use plastic verges (or caps) that clip over the edge of the tiles to keep them in place.
Disclaimer: The information contained on this page is intended as an overall introduction and is not intended as specific advice from a qualified professional. Travis Perkins aims to avoid, but accepts no liability, in the case that any information stated is out of date.