


Free Click & Collect
Within One Hour

Skylights and roof windows help to provide natural light to rooms that may need brightening up, without the need to add more electric lighting. For some, having more natural light streaming in from the ceiling is more pleasing, but there’s also the practicality of ventilation.
In cases where buildings are built close to each other, it can be difficult to place a window for an even flow of air for most rooms. Installing a roof window can get around this problem by clever placement to let light in. Here we explain the key things to look out for to help you prepare and plan.
Our VELUX installation guide will give you a general overview of what to expect when planning and installing roof windows. However, there are many different styles produced by VELUX, and specific installation guides are available for you to download directly from their website.
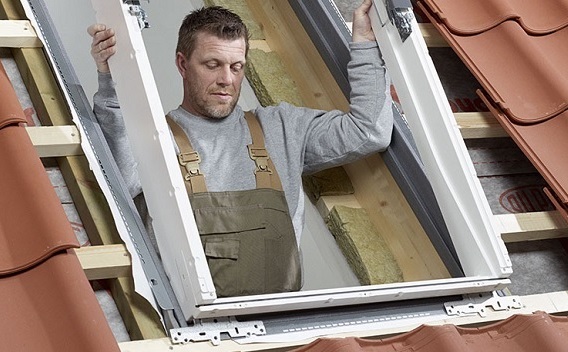
When fitting VELUX windows, you need the window itself, a VELUX window collar and window flashings for installing in a tiled or slate roof. You will also need an underfelt collar before replacing tiles or slates, and a vapour barrier.
When fitting a VELUX window, familiarise yourself with the different parts you’ll need for installation. The list below covers the most common parts you’ll find supplied with the window itself, or the flashing kit used when installed in sloped and tiled roofs. Some of these elements will be mentioned in the fitting guide, but always check the installation instructions supplied.
Supplied with window
Upper covers
Top covering with hood section
Lower covers
Supplied with flashing kit
Front edge with bottom apron
Bottom frame cover
Side flashings
Side frame covers
Gutter complete (back flashing)
While this guide gives a general overview of fitting a VELUX window, always consult the correct manufacturer’s fitting guides, as there are variations including flat roof and conservation roof windows. If you need more help with home maintenance, we have more guides and information at Trade Corner.
Disclaimer: The information contained on this page is intended as an overall introduction and is not intended as specific advice from a qualified professional. Travis Perkins aims to avoid, but accepts no liability, in the case that any information stated is out of date.
Always refer to the manufacturer's guidance and installation instructions.