


Free Click & Collect
Within One Hour

Reading time: 6 minutes
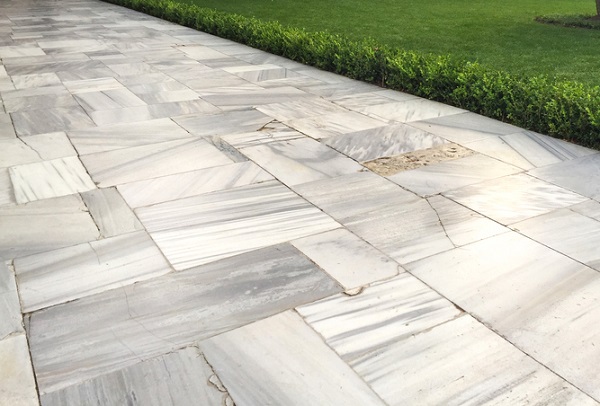
Porcelain paving slabs are a fantastic choice for many patios and outdoor areas. As well as being strong and durable, they are largely stain-resistant, come in a variety of shades and styles, and most have anti-slip properties. The disadvantages of porcelain paving slabs are that they can be notoriously difficult to cut, and they need to be installed in a certain way. Once the patio or path is laid, many porcelain slabs will last for many years without having any problems.
However, if the patio slabs are laid incorrectly, become damaged or if the wrong mortar bed is used, problems can arise. Here are some of the typical issues which can crop up and start to make your paving look less than inviting.
Sometimes, porcelain slabs can start to move and shift from their original position after being installed. This can happen if the wrong base is used, they are laid on an uneven bed, or the mortar mix is poorly prepared. Slabs can also start to shift if they aren’t installed correctly.
Porcelain paving slabs should be laid on a solid - and level - mortar bed made with a 4:1 sharp sand to cement mix. If this ratio is incorrect, not properly mixed, or if the patio is walked on before the mortar has set it can cause the slabs to start moving. Porcelain is non porous, so it also needs a priming slurry for adhesion. If this is not applied then the slabs can start to wobble and move, as well as if the slabs have been laid on an uneven base and/or sub-base. There’s also a possibility that water can enter through cracks in the grout if this isn’t properly installed, or the joints are too small, causing moss to grow and shift the tile.
Porcelain slabs can sometimes be a challenge to stick down securely to the substrate. Porcelain slabs are non porous, so they need a primer to be applied to the reverse of the tile to make sure it sticks to the base, approximately 2mm thick. Occasionally, this crucial step may have been missed, the wrong application technique used, or the incorrect primer type or a non-outdoor adhesive was used.
Adverse weather on the day can affect how well the tiles stick, where extreme heat, rain or cold can lead to common problems with porcelain paving, so it’s crucial to plan in advance before you start laying.
Porcelain tiles, when laid correctly, shouldn’t crack. One of the advantages of porcelain tiles is that they are strong and should keep their colour and appearance for many years, but only if they are laid on a full bed of mortar and a flat surface. Incorrect installation methods, impacts from heavy items (such as furniture or bricks), structural movement, concrete settlement and subsidence, extreme temperatures or severe weathering plus damage from moisture can all be possible causes of chipped or cracked paving.
It’s important to transport and handle the slabs with care as, although they’re strong, one of the disadvantages of porcelain paving slabs is that they can be brittle when they are being cut. Consider sealing the tiles, and making sure the correct installation, care and maintenance methods are used, will heavily reduce the risk of damage. It’s also essential that each porcelain tile is cut correctly, with the recommended tools, as jagged edges and chips to the tile can lead to water or fungus getting inside and damaging it. When laying the slabs, make sure not to get any adhesive onto the front surface as this can cause damage to the glaze.
Porcelain slabs are designed to be robust and to keep their colour, but occasionally they can start to stain or discolour without proper care. If the tiles are damaged in transit or cut incorrectly, water and moss can enter the cracks and cause unsightly marks.
The lighter the colour of the slab, the more at risk it can be to staining from rust, bird droppings or moss and lichen. However, as the tiles are non porous they are usually much easier to clean than other natural stone slabs.
Be sure to use the correct cleaning fluid, such as pH-neutral or mildly alkaline detergent that is designed for porcelain paving. Bleach and other strong chemicals can cause discolouration, as can highly abrasive wire brushes. The tiles can be sealed to help protect them, and for easy maintenance the paving can usually simply be brushed regularly with a broom.
If slabs are starting to move, you’ll need to take up the loose slabs, remove the mortar bed underneath and re-install this, ensuring it is fully level, and using the correct materials. Any damaged grouting will need to be re-pointed too, to prevent future water damage and erosion under the tile.
Here are the steps you’ll need to take:
Wait until the weather is dry, and not too hot or cold
Ensure you have the correct tools and personal protective equipment - including eye protection, knee pads and gloves
Remove the grout or jointing compound around each wobbly tile - this can be done using a utility knife, grout saw or grout rake, rotary tool with attachment or die grinder
Insert a chisel carefully under the tile, around each side, to gently loosen it
Carefully remove the tile and place it securely in a safe place. If the tile will not come out, or is damaged, you may need a more heavy duty hammer drill, jackhammer or masonry hammer to break the tile up to make it easier to remove
If reusing the tile, clean or gently chip off any residue from the back
Remove old mortar underneath where the slab was
Dig down at least 150mm below the desired level
Lay in core of approximately 80mm thick and ensure sub base and mortar mix is the correct ratio before applying
Use a spirit level to check the angle or slope
Add a layer of priming slurry on top of the mortar before re-installing slab (or new slab)
Don’t ‘dot’ the mix onto the tile but spread evenly - as this can lead to unevenness in the future
Wait to set for a minimum of 24 hours before walking on it and re-pointing
Ensure patio drainage is sufficient to stop excess water pooling, which can help to prevent future damage
Consider sealing the tiles to protect them
Ensure regular cleaning to avoid moss growth and help prolong the patio’s life
By installing the slabs correctly and looking after your patio, you can help to avoid many of the associated problems with porcelain paving. For more advice on laying paving slabs, as well as landscaping inspiration and tips, visit the Travis Perkins Trade News and Advice hub.
Porcelain slabs can start to wobble if they are laid incorrectly, if the wrong base is used, if they become damaged through impact or weathering or if they are not properly maintained. Water and moss can get underneath the tile if the grout is damaged, and tiles can start to crack if they are not cut using the proper tools. Subsidence, erosion and concrete settlement can also make slabs move.
Porcelain slabs are non porous, so they need a primer to be applied to the reverse of the tile to make sure it sticks to the base. They also need to be laid on a full bed of mortar and a flat surface. Incorrect installation methods, structural movement, concrete settlement, extreme temperatures, moisture damage or severe weathering can also cause problems when sticking slabs.
Porcelain slabs are known for their durability, but they can crack if they’re incorrectly cut, installed on a non-flat base or laid on the wrong substrate. Occasionally, extreme temperatures can lead to expanding and cracking, as well as subsidence, hard impacts, moisture damage, chemical damage through improper maintenance or being installed when wet can lead to cracking.
To lay porcelain slabs outside, they should be ideally applied to a solid substrate base, such as concrete, or a sand and cement mix screed of 4 parts sharp sand (or grit) to 1 part cement. This will prevent the tiles from moving and cracking. Many landscapers recommend the sand and cement mix, as this dries faster and reduces the risk of a cracked base which can damage tiles.
Disclaimer: The information contained on this page is intended as an overall introduction and is not intended as project-specific advice from a qualified professional. Always follow the manufacturer’s instructions.