





Free Click & Collect
Within One Hour

Reading time: 6 minutes
Path edging helps to create clear, clean, and defined boundaries between different areas in a garden.
It can be used to separate patio areas from a lawn, for instance, or garden beds from a pathway to maintain structure and avoid gravel, soil, or grass from spilling over.
By laying path edging around an outdoor space that you’re working on, you can also prevent paving materials from moving when people step on them. This is because path edging acts as structural support to hold everything in place.
Follow these steps as a guide to install path edging:
1. Use a measuring tape to measure and mark out the border you want to achieve with path edging.
2. Dig a trench that is around six inches deep along the full border using either a trowel or a spade.
3. Make sure the bottom of the trench is level throughout by using a spirit level, so that uneven edging can be prevented.
4. Position the path edging blocks along the border, checking that they fit the required layout and alignment.
5. Place the blocks of path edging into the trench, leaving around two thirds above ground and at least one third buried to help prevent shifting. Gently tap it into place using a mallet.
6. Secure the edging with concrete, particularly alongside paths or paving where extra support can help prevent movement. Use the rubber mallet to hammer stakes vertically into the soil side of the structure, spaced around seven inches apart.
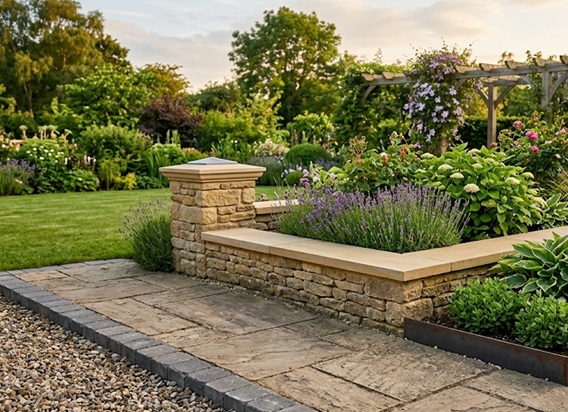
Coping stones make up the highest layer of a freestanding wall, binding different parts together and protecting the structure from weather exposure.
Coping stones are also designed to enhance the visual appeal of a garden wall. They provide a structure with a finished appearance that can be either traditional or contemporary depending on the choice of material.
Securely lay coping stones onto a wall by following these steps as a helpful guide:
1. Prepare the wall that is being fitted with coping stones, by clearing it of all debris to achieve a smooth and flat base.
2. Use a suitable mortar mix that is identical to the type and colour of mortar used to build the rest of the wall.
3. Fit each coping stone so that it slopes slightly away from the wall – allowing water to drain correctly – as well as with an even overhang on either side of the wall for balance and stability.
4. Secure each coping stone in place using the mortar mix and applying gentle taps from a rubber mallet.
5. Allow the mortar to set fully before disturbing the coping stones. A waterproof sealant can be applied if preferred, but is not essential.
Pier caps are similar to coping stones, in that they are placed on top of a structure to provide protection against the weather and also to add a decorative finish.
While coping stones are fitted to the top of a freestanding wall though, pier caps should be installed on top of pillars, garden posts, or columns which make up the entrance or boundary walls of a property.
Pier caps are installed in much the same way as coping stones, using a suitable mortar or cement mix to secure them in place.
Looking for more advice to improve your garden and landscaping projects? We have this dedicated area of our Trade Corner hub, which is filled with inspiration for turning any outside spaces into eye-catching havens.